Best Rifle Barrel Installation Tools: Complete Guide
The right rifle barrel installation tools make the job simple and safe. With proper gear, you protect threads, achieve correct torque, and improve accuracy. In this guide, you will see the essential tools, how to use them, and common mistakes to avoid.
Why the Right Tools Matter for Rifle Barrel Installation
Using the correct tools prevents damage and saves time. In addition, it delivers repeatable results. As a result, your build is safer and more consistent at the range.
Essential Rifle Barrel Installation Tools
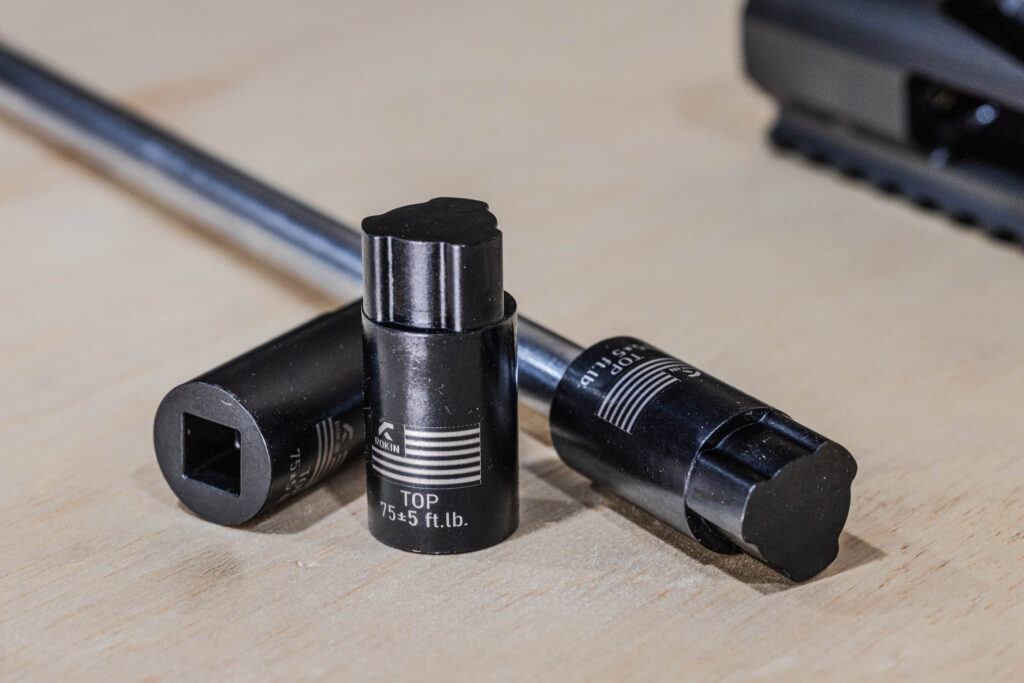
Action Wrench Torque Socket
A dedicated action wrench socket lets you apply precise torque directly. Therefore, you avoid guesswork and protect your receiver lugs. For Solus builds, use the Rokin Action Wrench Socket. It fits correctly, and it makes removal easier later.
Torque Wrench
A calibrated torque wrench is mandatory. Click or digital models work, however calibration matters most. Check it yearly for accuracy.
Barrel Vise
A solid vise holds the barrel steady while you torque the action. Choose jaws with proper inserts. This prevents movement and protects the finish.
Anti-Seize Compound
Nickel or copper anti-seize reduces galling. In addition, it makes future disassembly smoother. A thin coat on threads is enough.
Headspace Gauges
Use “Go” and “No-Go” gauges to verify chamber safety. Skipping this step can lead to pressure issues. Therefore, always confirm headspace after installation.
Step-by-Step: Using Rifle Barrel Installation Tools
- Secure the barrel. Place it in a vise with proper inserts. Tighten until it does not move.
- Prep the threads. Clean them and apply a light coat of anti-seize, because this prevents galling.
- Thread on the action. Start by hand. Turn slowly to avoid cross-threading.
- Insert the torque socket. Align the “Top” mark with the rail for easy removal.
- Attach the torque wrench. Use a 3/8" extension if needed. Seat the tool fully so it does not slip.
- Apply torque. Pull smoothly to the manufacturer spec. For Solus actions, 75 ft-lbs is typical. For official guidance, see Aero Precision.
- Verify headspace. Check with “Go” and “No-Go” gauges. As a result, you confirm a safe chamber.
- Final check. Ensure alignment with the top rail. Then remove the socket and inspect the fit.
Common Mistakes to Avoid
- Over-torquing the action, which can strip threads.
- Using generic tools that do not fit the receiver.
- Skipping anti-seize, which makes disassembly difficult.
- Ignoring headspace checks after installation.
Where to Buy Quality Rifle Barrel Installation Tools
Start with the key tool: the action torque socket. The Rokin Action Wrench Socket pairs with your torque wrench for precise, repeatable installs. In addition, you can find other bench tools on our shop.
Related Guides
- Rifle Barrel Torque Guide — step-by-step torque process for consistent results.
With these rifle barrel installation tools and steps, you can build safely and confidently. Therefore, your rifle will perform the way it should.
FAQs
What are the essential rifle barrel installation tools?
Calibrated torque wrench, action wrench torque socket, barrel vise, nickel anti-seize, and headspace gauges.
Why use a dedicated action wrench socket?
It allows precise torque with a torque wrench and protects lugs and threads for repeatable results.
Do I need headspace gauges after installation?
Yes—use Go/No-Go gauges to confirm a safe chamber.